An Introduction to Studio Lighting

Although continuous light can be used, I would thoroughly recommend that, if you want to get serious about studio photography, you invest in a couple of studio flash heads. These do not need to be expensive, nowadays you can get a couple of lights for about the same price as a halfway decent telephoto lens.
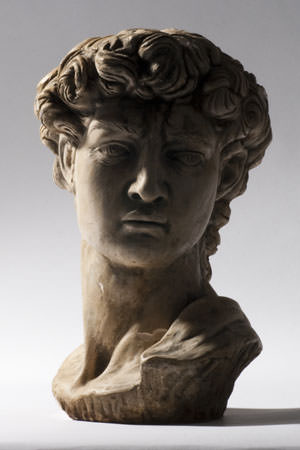
Studio flash heads have several advantages for the photographer because they are powerful, even the lower priced units kick out much more power that the average portable flash, and infinitely more than continuous light. This means that you can control the light in interesting ways by using umbrellas and soft boxes to diffuse the light and soften the shadows, whilst still getting a reasonable exposure at a small aperture. Flash can freeze the action (as you can see from the picture on the left), with very fast exposure times, and give you all the depth of field you need. All the head shots below were exposed at 1/100sec at f32 with the ISO set at 200. Although your portrait sitter will not move as fast as my Martini, hopefully, the pictures will be a lot sharper using flash than they will using continuous light. Studio flash heads also recycle very fast, much faster than a portable flashgun, so you can keep shooting at a fast rate, which is important when you are doing portraits.
You don't need to go for any top of the range lights unless you are going to take up studio photography for a career. The top professional gear will be bigger, more powerful and more reliable when used all day everyday, but in my experience the bottom of the range lights are certainly powerful enough for use with our DSLR cameras, and as for reliability, I have had the same lights for ten years now and would expect at least another ten years' service out of them. I have never had any reliability problems with studio flash, which is a lot more than I can say for the portable battery flashguns that I have used over the years.
Diffusers
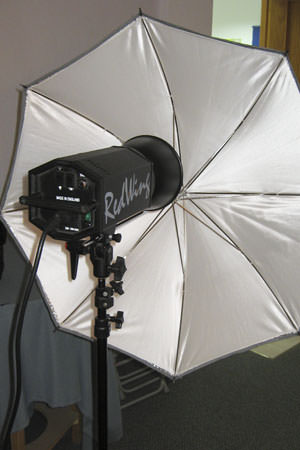
In order to produce a soft light that will in turn produce soft edged shadows, we need to spread the light out with a diffuser. There are several different kinds available, window lights, 'swimming pools' etc, but the most useful, versatile and portable is the umbrella. They can be used to shoot through or to reflect the light. The parabolic shape helps to focus or de-focus the light a little (depending on which way round you use it), and they fold up nicely for transport and storage. Shooting through a translucent umbrella |
 A two light setup, one through and one bounced |
 Bouncing the light into an opaque umbrella |
 Using the flash without a diffuser |
Lighting for Portraits
OK, enough about the equipment, as always it is what you do with it that matters most. Most people, when they first get their two studio lights, set one up on each side of them and try to produce an even light with as few shadows as possible. This is a reaction to the years of frustration using flash on camera and getting those ugly shadows down the side of the face and under the chin. Yes of course you can eliminate such shadows with ease but you can also do a whole lot more.Think of the two lights as a 'main light' and a 'fill light', then light the object (or person) with the main light first. Move it around to get different effects and see how the shadows fall. Then use the second light, on a lower setting or further away (see the inverse square law for more info) to soften the shadows you have created with the main light but not eliminate them altogether. Below are some examples of popular lighting setups.
 |
 |
 |
 |
 |
 |
These are just three lighting combinations you can use to get you started, the exact placement of the lights will depend on your subject, whether they have long hair or short, dark or light, what characteristics you want to enhance and what you want to hide, and so on. The important thing to remember is that, no matter how many lights you use, one is the main light and all the others are fills or effects, light the subject first with one light then add others as needed.
No comments:
Post a Comment